Not all plumbing projects require a professional’s touch. Installing a new drain in your bathroom or kitchen plumbing fixture is an easy task for the keen DIYer with the right tools and a little patience. Here are five key steps to help you install a new pop-up drain in your bathroom.
How to drop in a new pop-up sink drain
Time: 2-3 hours
Frequency: As needed
Difficulty: Easy
Tools: pop-up drain, plumber’s putty, channel lock wrench, bucket
Before you begin, it’s important to note that drain installation is similar for most sinks, tubs or showers, but can differ slightly depending on the size and type of the drain and sink style. Always check with a professional if you are unsure.
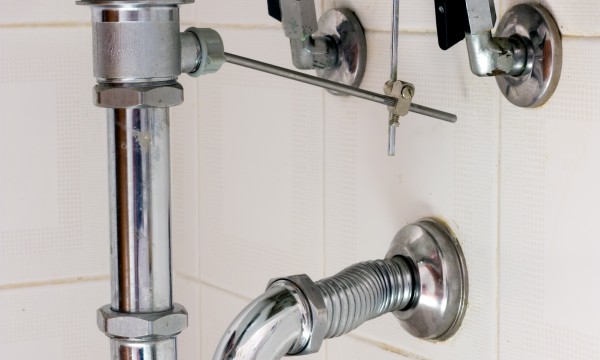
Step 1: Remove the old drain and pop-up stopper
- First, remove the P-trap that connects the pop-up drain to the main drainpipe. Make sure to put plenty of rags or a small bucket under the trap, as it will contain water.
- Remove the pop-up stopper by pinching the spring clamp, slipping it off the end of the pivot rod and disconnecting it from the extension bar. Unscrew the pivot nut and remove it from the sink drain.
- Loosen the jamb nut from the tailpiece with a wrench, twisting counter-clockwise, and then use your fingers to unscrew it completely and remove.
- Remove the drain flange and the drain stopper.
- Scrape off the old plumber’s putty on the drain hole in the sink, taking care not to scratch your sink.
Good to know!
If the pop-up stopper needs replacing, very often the cost of a complete pop-up drain assembly is only slightly more than a new pivot rod with the ball and nut. If so, replacing the entire pop-up drain rather than just fixing the stopper’s rod may be your best option.
Step 2: Install the new sink drain
- Unscrew the drain flange from the rest of the new drain assembly.
- Apply a generous amount of plumber’s putty to the bottom of the drain flange and push the flange into the drain hole from the top of the sink.
- Back underneath the sink, screw the tailpiece into the drain flange. It works best to hold onto the flange from above. While it is possible to do this alone, a second pair of hands would be a great help.
- Make sure the port for the stopper rod is positioned to the rear.
- Tighten the jamb nut by hand until the black rubber gasket sits evenly against the bottom of the sink drain. Use a wrench if necessary to get a good watertight seal.
- Screwing in the tailpiece to the flange will push excess plumber’s putty up into the sink. Clean it off with a putty knife and wipe the sink clean.
Good to know!
Plumber’s putty forms a watertight seal between the hard surfaces of the drain flange and the sink bowl, so the sink will hold water when the stopper is closed. Do not apply putty to the black rubber gasket on the sink bottom as the gasket will flex and seal between the sink and drain body.
Step 3: Install the pivot rod
- Remove the retention nut from the pop-up drain.
- Insert the rod with pivot ball through the retention nut.
- Push the rod into the pop-up drain and tighten the retention nut.
- Place the new pop-up stopper into the sink drain making sure that the notch faces the back of the sink so it can connect with the rod inside the sink drain.
- Insert the lever at the back of the faucet and attach it to the extension rod and clip into place.
- Work the lever up and down a few times to make sure the stopper rises and closes appropriately without being too sloppy or closing under its own weight.
Good to know!
The extension rod will have a variety of notches. Usually the second or third notches are a good place to start. Lengthen or shorten depending on your sink and drain size.
Step 4: Reinstall the P-trap
- Slide the P-trap slip nut over each end of the pop-up drain followed by a slip washer, beveled side facing down.
- Screw the P-trap into the slip nuts and tighten.
Step 5: Turn on water and test for leaks
- Open the faucet for a few minutes and check all joints for leaks.
- Tighten nuts if necessary to stop any leaks.
- Wait 30 minutes or so, then re-check the joints to catch any slow leaks.
Now that you’ve successfully removed and replaced a pop-up drain in your bathroom sink, you can enjoy the leak-free fruits of your labour. Fill up that sink. Drain that sink. See that quality seal? You did that! Congratulations.
National advertising powered by Mediative.com. Yellow PagesTM, Walking Fingers & DesignTM, YP.caTM, Find. & DesignTM, YellowPages.caTM, Canada411TM and YP ShopwiseTM are trademarks of Yellow Pages Digital & Media Solutions Limited in Canada. All other trademarks are the property of their respective owners. Copyright © 2018 Yellow Pages Digital & Media Solutions Limited. All Rights Reserved.


